




2.5 Ton Evaporator Coils

 --%3E %3Csvg version='1.1' id='No-RB' xmlns='http://www.w3.org/2000/svg' xmlns:xlink='http://www.w3.org/1999/xlink' x='0px' y='0px' viewBox='0 0 100 100' enable-background='new 0 0 100 100' xml:space='preserve'%3E %3Cpath fill='%23CECECE' d='M79.44,0.95H20.56C9.78,0.95,0.95,9.78,0.95,20.56v58.87c0,10.79,8.82,19.61,19.61,19.61h58.87 c10.79,0,19.61-8.83,19.61-19.61V20.56C99.05,9.78,90.22,0.95,79.44,0.95z M65.38,58.24l9.38,29.58L49.69,69.78L24.5,87.82 l9.34-29.6L8.8,39.6l30.73-0.17c0,0,6.98-19.61,10-28.93c0.54,1.36,9.88,29.1,9.88,29.1H91.2L65.38,58.24z'/%3E %3C/svg%3E)
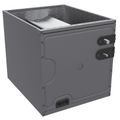
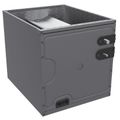
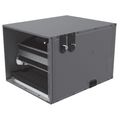
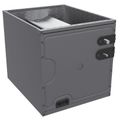

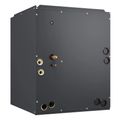
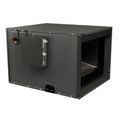

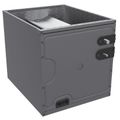
2.5 ton evaporator coils are the indoor heat exchange component paired with a 2.5 ton outdoor condensing unit or heat pump, matched to a nominal 30,000 BTU cooling load. Refrigerant expands and absorbs heat as it passes through the coil, cooling and dehumidifying the air the blower pushes across it before sending it into the supply ductwork. Getting the coil size right against the rest of the system keeps refrigerant charge, airflow, and capacity working together instead of fighting each other.
Replacement jobs make up a large share of the demand in this size range, since a failed or leaking coil on an otherwise healthy 2.5 ton system is often cheaper to swap than to replace the whole outdoor unit. Matching cabinet width, coil configuration, and refrigerant type to the existing equipment is the first decision on any of these jobs, and it shapes everything else about the install.
Subcategories
- Cased Coils: Cased coils come enclosed in a sheet metal cabinet ready to set on top of a furnace or connect to ductwork directly. Replacement jobs favor cased coils because the cabinet already matches standard duct transition dimensions. Most cased 2.5 ton coils are built for upflow, downflow, or horizontal orientation, so confirming airflow direction before ordering avoids a return trip. They install faster than uncased coils since there's no separate cabinet to build or seal.
- Uncased Coils: Uncased coils ship without an enclosure and get installed inside a site-built or existing plenum. Contractors reach for uncased coils when a custom cabinet is already in place or when a nonstandard duct configuration rules out a factory cased unit. Sealing the surrounding plenum properly matters more with uncased coils, since any gap around the coil lets conditioned air bypass it. They tend to cost less than a comparable cased option but require more field labor to finish the installation.
- Cased Multi-Position Coils: Multi-position coils are cased units designed to work in upflow, downflow, and horizontal orientations without modification, giving installers flexibility on jobs where the furnace or air handler location isn't fixed ahead of time. They're common on new construction and larger remodels where the mechanical room layout can still change. Refrigerant line connections and drain pan placement are built to accommodate any of the supported orientations. Confirming the specific model supports the intended orientation before installation still matters, since not every multi-position coil is rated the same way.
- Coil Kits and Accessories: Coil kits and accessories include drain pans, TXV (thermal expansion valve) kits, and line set adapters that finish out a coil installation. A properly matched TXV keeps refrigerant metering accurate for the specific coil and system combination, which protects compressor life. Auxiliary drain pans are often required by code in attic or above-ceiling installations to catch condensate if the primary pan fails. Stocking the right accessories alongside the coil itself avoids delays waiting on a separate part.
Buying Guide
Matching a replacement 2.5 ton evaporator coil starts with the existing outdoor unit, not the coil that's failing. Confirm the tonnage, refrigerant type, and cabinet width of the condenser or heat pump before selecting a coil, since an evaporator coil sized or metered incorrectly against the outdoor unit undermines both capacity and efficiency even if it fits physically inside the cabinet.
Cabinet width and airflow orientation come next. Furnace and air handler cabinets are built to standard width increments, and a coil that doesn't match forces field modification of the plenum or ductwork. Confirm whether the application needs upflow, downflow, or horizontal airflow, and whether a multi-position coil makes more sense for flexibility on future service.
Refrigerant compatibility is non-negotiable on any replacement job. A coil built for one refrigerant type will not perform correctly, and in some cases will not hold pressure safely, if paired with a different refrigerant than it was designed for. Confirming refrigerant type against the outdoor unit's nameplate avoids a costly mismatch discovered after installation.
Decide between a cased and uncased coil based on the mechanical room layout. A cased coil sits directly on a furnace or connects into an existing plenum with minimal field fabrication. An uncased coil fits jobs where a custom cabinet is already built or planned, at the cost of more field labor to seal it properly.
Round out the order with a matched TXV kit and, where code requires it, a secondary drain pan for attic or above-ceiling installs. Skipping the correct metering device on a replacement coil is one of the more common causes of a callback on an otherwise straightforward coil swap.
Frequently Asked Questions
How do I know if I need a 2.5 ton evaporator coil?
The evaporator coil tonnage should match the outdoor condensing unit or heat pump it pairs with, which is listed on the outdoor unit's nameplate. A 2.5 ton coil is built for a nominal 30,000 BTU system, so confirming the outdoor unit's rated tonnage first is the fastest way to order the correct coil.
Can a 2.5 ton evaporator coil be paired with a different tonnage condenser?
Pairing mismatched tonnage between the coil and condenser reduces efficiency and can shorten compressor life, so manufacturers generally require matched components within a listed system. Sticking to the tonnage specified for the outdoor unit keeps the system operating as designed.
What's the difference between a cased and uncased evaporator coil?
A cased coil comes in its own sheet metal cabinet ready to connect to ductwork, while an uncased coil installs inside a site-built or existing plenum. Cased coils typically install faster, while uncased coils suit jobs with a nonstandard or already-built enclosure.
Do I need a new TXV when replacing a 2.5 ton evaporator coil?
In most replacement jobs, yes. The thermal expansion valve meters refrigerant specifically for the coil and system combination, so installing a coil without a matched TXV kit risks incorrect refrigerant metering and reduced system performance.
Is a secondary drain pan required with a 2.5 ton evaporator coil?
Many local codes require a secondary drain pan when the coil is installed in an attic or above a finished ceiling, to catch condensate if the primary pan overflows or fails. Checking local code requirements before installation avoids a failed inspection.
