


'/%3E%3C/svg%3E)
MANUALS (2)
Product Highlights
Description
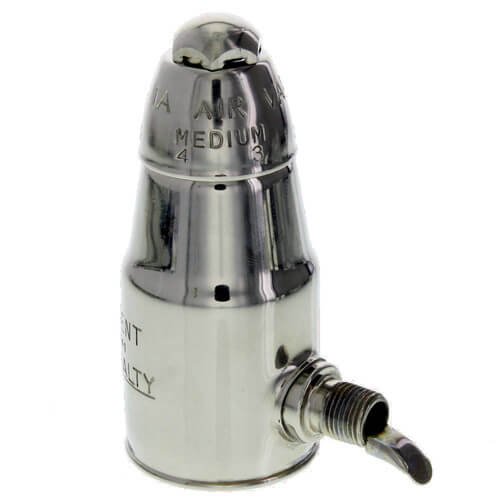
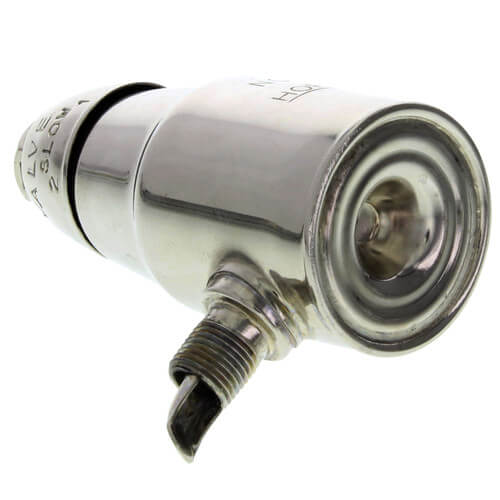
- Air Valve (non-vacuum)
- Float-type vent
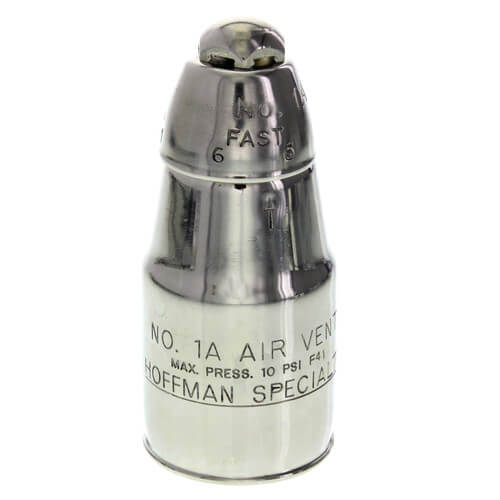
- Adjustable port for true proportional venting v 6 port settings from slow (1) to fast (6)
- 1/8" NPT angle connection
- Maximum operating pressure 1.5 psig (0.1 bar) (Drop away pressure - maximum pressure against which the vent can open).
- Maximum pressure 10 psig (0.7 bar)
Specs
| Application: | Radiator Vent |
|---|---|
| Size: | 1/8" |
| Type: | Float-type Vent |
| System Type: | Steam |
| Max Pressure: | 10 psig |
| Max Operating Pressure: | 11.2 |
| Mount: | Angle |
| Adjustability: | Adjustable |
| Material: | Steel |
| Body Pattern: | Angle |
| Thread Type: | Male |
| Temperature Range (F): | 140°F - 240°F |
| Max Temp (F): | 240°F |
| Min Temp (F): | 140°F |
| Thread Size: | 1/8" |

Questions?
Compare Similar Products

You May Also Need
Product Reviews
Most Liked Positive Review
Great Product
Most Liked Negative Review
Not As Good As They Used to Make Them
This valve was just the ticket!
Works Great
Immediate and noticable improvement
I would purchase this product again and again.
Steam heat replacement valves
the only vent on the truck
great steam air valve
Didn't even last a year. never closes and is loud
I will purchase this product again for my other radiators.
Good product, while it worked
Product Q&A
8 QuestionsQ: What is the typical life span of an Air Vent ? I'm dealing with an 80 year old elementary school that thinks it's better to wire an empty coffee can beneath the vent to catch water than to renew the vents. Trying to educate them.
Asked by Bernie 12 years ago
Add your answer
The manufacturer recommends replacing these Air Vents after 10 years of use.
Hello, Disclaimer: I am not a licensed plumber or HVAC professional, just a guy with a 110-year old house that needed to figure out how single-pipe steam works in order to save money and keep my wife and kids warm. That being said, many vents can last for decades if cared for properly. In the case of your 80 year old elementary school, it sounds like you have "wet steam" if you're dripping water. Also, your existing vent probably doesn't have a float or the float is stuck due dirt/rust/age. This is what is causing water to spurt out. The Hoffman 1A vent is a good replacement and has a float. The float sits in alcohol, which has a lower boiling point than water. At the right temperature, it will pop up and prevent water/steam from leaking out. You may also want to check out Gorton vents, which also have floats. The Gorton vents aren't adjustable, however their "C" and "D" models purge air much more quickly, causing a radiator to warm up faster than the Hoffmans. Stay away from the junk (Maid o Mist) that you find in Lowes or Home Depot. Here is a link to a great article by Dan Holohan that explains more about vents for single-pipe steam. http://www.oldhousejournal.com/magazine/2004/nov/care.shtml Dan wrote a book on how to operate and maintain steam systems. It is titled, "We Got Steam Heat," and is available on Amazon. If you deal with steam heating systems frequently, it is definitely worth the purchase. Good luck!
foryou use boiler condition er regularly you can expect them to work for 20+ years. Desn Sent from the Samsung Galaxy Rugby Pro, an AT&T LTE smartphone
Every year I replace all my vents for ~$150 (7 steam vents) -- it saves me having to call a plumber for boiler issues every winter save possible $400-600 every year! If I let them go for two years I usually have to replace 2 or 3 vents That eventually fail
Q: I am working on a hot steam system. The radiator/vent is the farthest from the broiler and is normally the last to get hot. What should I do if the valve does not shut completely after the radiator gets hot? The valve has a slight whistle to it when the heat is on. Also is pipe dope suggested when replacing or after cleaning? FYI...after I hit preview I was asked to confirm that I am older than 13 years old. Should this say 18 years old?
Asked by charlie 13 years ago
Add your answer
Two options Simplest (but not recommended) is to increase the pressure on your steam boiler cutoff. If it's at 4 psi increase it to 6. Risk is that if you may develop leaks where you had none before, plus your boiler will operate to a higher temperature, and be less efficient. Second option is most efficient, but takes the most time and costs the most money, but your heating bills will decrease (slightly). All radiators, regardless of how close or far from the boiler should fill at the exact same time. You can do this by buying adjustable air vent valves and putting them on all radiators. The radiators closest to your steam boiler should have air vents set to 1 or 2 (slow). At this setting the air vent has a tiny hole, which adds back pressure (choke) and slows the radiator steam fill time. The radiator furthest should be set to 6 (fast). This will reduce back pressure and have it fill the radiator faster. The goal is to have all radiator air vents adjusted so they all fill evenly. Half of the radiator "rungs" should be hot on all radiators at the same time, and then eventually all "rungs" should be hot at the same time on all radiators. The radiators will all fill to the same pressure, all vents will close and your house will be evenly heated. You will probably have to be there for 3 or 4 cycles before you have each air vent adjusted to the correct setting so they all heat up evenly. My final configuration was as follows Main floor: one radiator set at 1, two set at 2 and one set at 3 Second floor: one radiator set at 4, two set at 5 and two set at 6 These roughly correspond to how far away the radiators are from the steam boiler and the length of pipe they have to travel for both source and return.. The air vents are stainless steel. Teflon tape works great. Whistling valves are not an issue so long as they eventually close. Last tip, make sure the radiator is slightly tilted to the steam feed/drain, otherwise you may have some water blowing out the air vent valves. I used nice shims under 2 of the radiator feet.
A whistle might indicate a poor seal between the valve and the radiator (hand tightening, even if it pushes the valve past straight up-and-down, is a fix) or buildup/fluid in the valve itself. If the latter, remove, tap out any water and consider dunking the hole thing in vinegar for a bit if there's any rust or whiteness to the water (or if there's no water). Worse comes to worst, replace the valves, especially if they're old, damaged, or missing any parts like the cap.
Hello. I had a similar challenge in my 108 year-old house. The radiator on my top floor was the last to get hot and it was always very chilly during winter. In my case, for that particular room, I didn't go with the Hoffman vent that you're looking at. Instead, I went with a Gorton D non-adjustable vent. Here is the link: http://www.pexsupply.com/Gorton-GDA-Gorton-No-D-Angle-Vapor-Equalizing-Valve-3537000-p The Gorton D purges air much more quickly than most other vents and it is meant for radiators that are at the greatest distance from the boiler. Since replacing, my top floor has been very warm on the coldest of winter days. There have even been a few occasions when I've had to crack a window to cool the room off. When replacing the vent, I just put a little bit of Teflon tape around the threads. It doesn't take much to make a nice seal...just a couple times around. Good luck!
You need to go to heatinghelp.com and do a little home work. -Michael
Q: What setting should I use for the radiator that is closest to the boiler 1 0r 6?
Asked by Tony 13 years ago
Add your answer
Hello, there. Location shouldn't matter but, rather, the size of the radiator dictates how fast/slow to vent it. But post your question on the forum here: http://www.heatinghelp.com/Forum. These guys will definitely give you the full insight and details you need! :) Good luck! Jen
6 is the highest setting for the air valve. I would set it at 1, or you might even have to shut down that particular radiator altogether. I made changes to my system as a result of a renovation project (much to my disappointment) and I had to adjust the actual steam valve on those nearest the boiler. The balance of the system was better before the changes. Too late to go back now. Hope this info is helpful.
I think you want it to be more open closer to the boiler... i think 1 is closed and 6 is open but not positive.
You should set it to 1 or 2. The installation instructions say the following: Setting (or Port No.) 1 or 2 = Radiation located nearest the boiler or areas that overheat Setting (or Port No.) 3 or 4 = Normal venting of radiation under normal conditions Setting (or Port No.) 5 or 6 = Radiation located farthest from the boiler or areas that are hard to heat.
The vent located near the boiler should be a "1". The vent located farthest from the boiler should be a "6". The install guide on th PEX website is very helpful.
Q: How many adjustable levels/numbers does the valve have? 1-5, or 1-10?
Asked by Carter 14 years ago
Add your answer
This valve has six settings: 1 & 2 (slow), 3 & 4 (medium), and 5 & 6 (fast).
six
It has 6 setings.
Q: can this be use on a two pipe system? does two pipe system need air valve?
Asked by 15 years ago
Add your answer
Yes this could be used on a two pipe steam system.
Q: Can these be used on a one pipe system.
Asked by Brian 15 years ago
Add your answer
Yes, as long as it is a one-pipe steam system.
Yes they can!
Yes
Yes, I just installed a six pack of them on a one pipe system and they are working fine. For those who might read this and don't know what a one pipe system is it means that only one pipe enters the radiator. Steam enters the radiator, condenses into liquid water and gravity causes it to drain back down the same pipe to the boiler.
Absolutely..... My system is one pipe system and they are perfect.
Q: How does a person clean the air valve?
Asked by b 16 years ago
Add your answer
The manufacturer recommends boiling a 50/50 mixture of vinegar and water to use when cleaning the valve.
Q: what should I do if the vent is not allowing air to escape?
Asked by b 16 years ago
Add your answer
The valve may be clogged and need to be cleaned. If that does not solve the problem, we would recommend replacing the valve.
Try cleaning the vent in a vinegar solution. If that doesn't fix it, you need a new one, since the alcohol-filled capsule isn't working any more.
Make certain that the variable valve top with numbers can move and there are no missing parts. Turn it to a higher number than 1; turn to 3 or 4. Be sure the radiator is turned on and you have given the furnace enough time to heat up to evaluate the results. Above all, make certain the variable valve has been seated and sealed properly on the radiator before all of the above has been completed.