



PEX Crimp Check Valves

 --%3E %3Csvg version='1.1' id='No-RB' xmlns='http://www.w3.org/2000/svg' xmlns:xlink='http://www.w3.org/1999/xlink' x='0px' y='0px' viewBox='0 0 100 100' enable-background='new 0 0 100 100' xml:space='preserve'%3E %3Cpath fill='%23CECECE' d='M79.44,0.95H20.56C9.78,0.95,0.95,9.78,0.95,20.56v58.87c0,10.79,8.82,19.61,19.61,19.61h58.87 c10.79,0,19.61-8.83,19.61-19.61V20.56C99.05,9.78,90.22,0.95,79.44,0.95z M65.38,58.24l9.38,29.58L49.69,69.78L24.5,87.82 l9.34-29.6L8.8,39.6l30.73-0.17c0,0,6.98-19.61,10-28.93c0.54,1.36,9.88,29.1,9.88,29.1H91.2L65.38,58.24z'/%3E %3C/svg%3E)


 --%3E %3Csvg version='1.1' id='Fill' xmlns='http://www.w3.org/2000/svg' xmlns:xlink='http://www.w3.org/1999/xlink' x='0px' y='0px' viewBox='0 0 100 100' enable-background='new 0 0 100 100' xml:space='preserve'%3E %3Cpath fill='%23F15C02' d='M79.44,0.95H20.56C9.78,0.95,0.95,9.78,0.95,20.56v58.87c0,10.79,8.82,19.61,19.61,19.61h58.87 c10.79,0,19.61-8.83,19.61-19.61V20.56C99.05,9.78,90.22,0.95,79.44,0.95z M65.38,58.24l9.38,29.58L49.69,69.78L24.5,87.82 l9.34-29.6L8.8,39.6l30.73-0.17c0,0,6.98-19.61,10-28.93c0.54,1.36,9.88,29.1,9.88,29.1H91.2L65.38,58.24z'/%3E %3C/svg%3E)
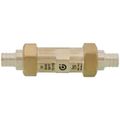
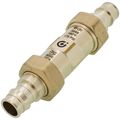
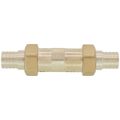
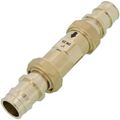

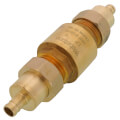
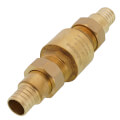
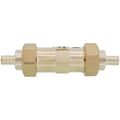
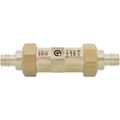
PEX Crimp Check Valves are inline check valves designed to connect directly onto PEX tubing using standard copper crimp rings, giving plumbers a way to add backflow prevention without switching to a different connection method mid-run. Most models use a spring-loaded poppet that opens under forward flow and seats closed when flow reverses, protecting recirculation lines, boiler feed lines, and other spots where backflow would cause damage or nuisance noise. Because the valve body accepts the same crimp ring size as the surrounding PEX tubing, a plumber already carrying crimp tools for the rest of the job does not need to add a separate soldering or pressing step just to install one check valve. The shared crimp connection makes these valves a common choice on remodel and repair jobs where the rest of the system is already PEX.
Subcategories
- 1/2 Inch Crimp Check Valves: Half inch crimp check valves are the most common size plumbers stock for single fixture supply lines and small recirculation loops. They fit directly onto half inch PEX tubing using the same crimp ring and crimp tool already on the truck for the rest of the run. Contractors typically install them close to the fixture they protect, since a shorter run between the valve and the fixture reduces the chance of trapped air affecting valve operation.
- 3/4 Inch Crimp Check Valves: Three quarter inch valves serve larger supply lines and whole house recirculation systems where higher flow volumes pass through the line. The larger valve body accommodates more flow before creating a noticeable pressure drop, which matters on longer recirculation loops feeding multiple fixtures. Plumbers sizing a recirculation system typically match the check valve diameter to the branch line rather than the main trunk line.
- Swivel Crimp Check Valves: Swivel style check valves include a rotating fitting on one or both ends that lets the installer align the valve body without twisting the PEX tubing itself. The rotating fitting helps in tight mechanical rooms where the tubing route leaves little room to turn a rigid valve body into place. Plumbers working in crawlspaces or tight closet installations often prefer the swivel style for this reason.
- Spring Loaded Poppet Check Valves: Spring loaded poppet valves are the standard internal design used across most crimp check valves, opening under forward flow pressure and closing by spring tension when flow stops or reverses. The spring tension is calibrated low enough that normal system pressure opens the valve without adding meaningful resistance to flow. Technicians troubleshooting a noisy or sluggish recirculation line often start by checking whether a worn spring is letting the poppet chatter instead of seating fully.
Buying Guide
Selecting the right check valve starts with matching the valve's connection size to the PEX tubing already in place, since a mismatched crimp ring diameter will not seal correctly regardless of how well the valve itself is built. Half inch and three quarter inch are the most common sizes on residential jobs, while larger commercial recirculation systems may call for bigger diameters.
Flow direction matters as much as size. Every crimp check valve is marked with an arrow showing the direction flow must travel to open the poppet, and installing the valve backward will block flow entirely rather than simply failing to prevent backflow. Confirming that arrow against the actual flow direction before crimping the connection avoids a callback to reverse a valve that was already sealed in place.
Contractors choosing between rigid and swivel body styles should base the decision on the tightness of the installation space rather than on cost alone. A swivel connection adds flexibility in cramped mechanical rooms, while a rigid body is simpler to install in open runs where rotation is not a concern. PEX Crimp Check Valves installed with the correct size, orientation, and body style rarely need service again once the system is pressurized and balanced, which is why getting these three details right during the initial install matters more than any other part of the job.
Frequently Asked Questions
Which direction does a PEX crimp check valve need to face?
Every valve has an arrow stamped on the body showing the direction flow must travel to open it. Installing it backward blocks flow completely rather than just failing to stop backflow. Checking that arrow against the actual water flow direction before crimping saves a return trip.
Can a crimp check valve be removed and reinstalled if I make a mistake?
Once a crimp ring is compressed onto the tubing, the connection is permanent and cannot be reopened without cutting the tubing. Contractors who are unsure about orientation should dry fit and confirm flow direction before crimping. Keeping a few spare valves and rings on the truck covers a misaligned install without stalling the job.
What size crimp check valve do I need for a bathroom fixture supply line?
Half inch is the standard size for most single fixture supply lines in residential bathrooms. Confirm the existing PEX tubing size before ordering, since the valve's crimp connection must match the tubing diameter exactly. A mismatched size will not seal even if the crimp ring is compressed correctly.
Do crimp check valves work on hydronic heating lines as well as potable water?
Yes, spring loaded poppet check valves are common on both potable water recirculation lines and hydronic heating loops. The internal design is the same in both applications, though system pressure and temperature ratings should be confirmed against the valve's rated specifications. Matching the valve to the system type prevents premature seal wear.
Why would a recirculation line stay noisy after installing a new check valve?
A worn or incorrectly sized spring can let the poppet chatter instead of seating fully, which produces a tapping or buzzing noise under flow. Confirming the valve size matches the branch line, rather than the main trunk line, often resolves the issue. Checking for trapped air near the valve is the next troubleshooting step if the noise continues.
