




'/%3E%3C/svg%3E)
 --%3E %3Csvg version='1.1' id='Fill' xmlns='http://www.w3.org/2000/svg' xmlns:xlink='http://www.w3.org/1999/xlink' x='0px' y='0px' viewBox='0 0 100 100' enable-background='new 0 0 100 100' xml:space='preserve'%3E %3Cpath fill='%23F15C02' d='M79.44,0.95H20.56C9.78,0.95,0.95,9.78,0.95,20.56v58.87c0,10.79,8.82,19.61,19.61,19.61h58.87 c10.79,0,19.61-8.83,19.61-19.61V20.56C99.05,9.78,90.22,0.95,79.44,0.95z M65.38,58.24l9.38,29.58L49.69,69.78L24.5,87.82 l9.34-29.6L8.8,39.6l30.73-0.17c0,0,6.98-19.61,10-28.93c0.54,1.36,9.88,29.1,9.88,29.1H91.2L65.38,58.24z'/%3E %3C/svg%3E)
 --%3E %3Csvg version='1.1' id='Half' xmlns='http://www.w3.org/2000/svg' xmlns:xlink='http://www.w3.org/1999/xlink' x='0px' y='0px' viewBox='0 0 100 100' enable-background='new 0 0 100 100' xml:space='preserve'%3E %3Cg%3E %3Cpath fill='%23F15C02' d='M30.05,70.23l3.79-12.01L8.8,39.6l30.73-0.17c0,0,6.98-19.61,10-28.93c0.54,1.36,9.88,29.1,9.88,29.1h1.58 L93.71,7.18c-3.58-3.82-8.66-6.23-14.28-6.23H20.56C9.78,0.95,0.95,9.78,0.95,20.56v58.87c0,5.41,2.22,10.32,5.79,13.88 L30.05,70.23z'/%3E %3C/g%3E %3Cpath fill='%23FBC8B4' d='M93.71,7.18L60.98,39.6H91.2L65.38,58.24l9.38,29.58L49.69,69.78L24.5,87.82l5.55-17.59L6.75,93.32 c3.55,3.54,8.44,5.73,13.82,5.73h58.87c10.79,0,19.61-8.83,19.61-19.61V20.56C99.05,15.4,97.01,10.69,93.71,7.18z'/%3E %3C/svg%3E)


MANUALS (2)
Product Highlights


Description
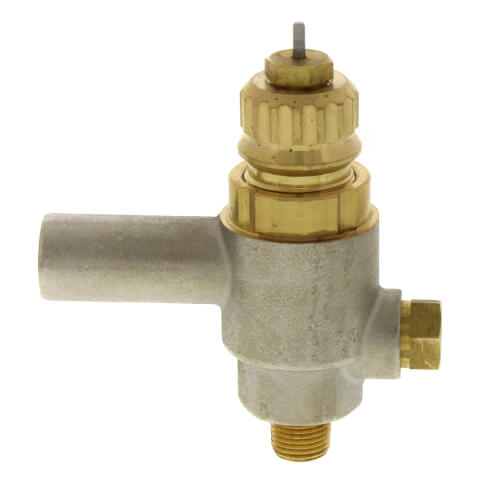
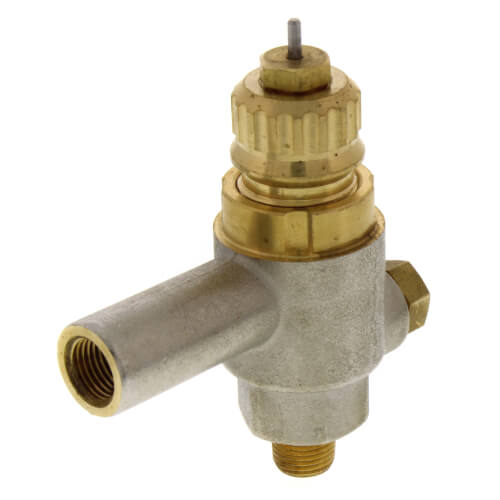
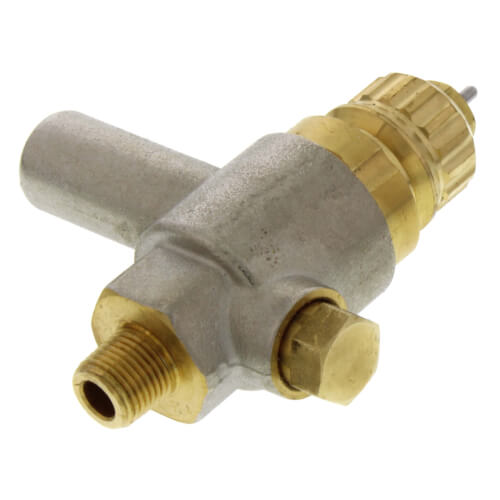
RA 2000 Danfoss Thermostatic radiator valves regulate the flow of hot water of hot water or steam through free-standing radiators, baseboards or convectors in hot water and two-pipe low pressure steam systems. This valve is designed for one pipe steam systems.
Specs
| Size: | 1/8" |
|---|---|
| Application: | 1 Pipe Steam |
| Connection Size: | 1/8" |
| Max Pressure (PSI): | 10 |
| Differential: | 6 Bar Max |
| Test Pressure (PSI): | 16 Bar |
| Connection Type: | Threaded |
| Temperature Range (F): | 250°F Max |


Questions?
Compare Similar Products
You May Also Need
Product Reviews
Most Liked Positive Review
Danfoss Rad Valves WORTH EVERY DIME
Most Liked Negative Review
 --%3E %3Csvg version='1.1' id='With-RB' xmlns='http://www.w3.org/2000/svg' xmlns:xlink='http://www.w3.org/1999/xlink' x='0px' y='0px' viewBox='0 0 100 100' enable-background='new 0 0 100 100' xml:space='preserve'%3E %3Cpath fill='%23FBC8B4' d='M79.44,0.95H20.56C9.78,0.95,0.95,9.78,0.95,20.56v58.87c0,10.79,8.82,19.61,19.61,19.61h58.87 c10.79,0,19.61-8.83,19.61-19.61V20.56C99.05,9.78,90.22,0.95,79.44,0.95z M65.38,58.24l9.38,29.58L49.69,69.78L24.5,87.82 l9.34-29.6L8.8,39.6l30.73-0.17c0,0,6.98-19.61,10-28.93c0.54,1.36,9.88,29.1,9.88,29.1H91.2L65.38,58.24z'/%3E %3C/svg%3E)
My second one!
Great product
Industry Standard
My second one!
So Far So Good.
So Far So Good.
So Far So Good.
yes
Like danffoss
Great
Works Great
Product Q&A
10 QuestionsQ: I have a one pipe steam heat system and want to put a TRV on a radiator in a room that over heats. The cast iron steam radiator has a wood radiator cover with a decorative metal screen on the front. For the Danfoss TRV (RA 2000 1PS) to work correctly do I need to use a combined remote mounted dial & sensor (e.g., 013G8562) and mount outside of the radiator cover (on a draft-free wall for the remote sensor) OR can I also use a valve mounted dial with a remote sensor (e.g., 01G8252) and mount the remote sensor outside of the radiator cove (on a draft-free wall)?
Asked by BBC 10 years ago
Add your answer
A remote mounted dial & sensor will be more convenient as you can adjust it from the wall as you would any thermostat. Having the dial inside the cabinet would be inconvenient.
Q: What is the grey cap shown in the photo and how can I remove it in order to attach the Danfoss Direct Mount Operator (013GB8250)? I'm asking because I don't see it mentioned in the instructions and I tried pulling it off without success - I don't want to break this fairly expensive valve. Thanks
Asked by FXP 11 years ago
Add your answer
The valve pictured is a DanFoss one pipe thermostatically controlled steam valve. The gray cap is used to protect the valve during shipping. It will screw off counterclockwise and then be replaced by the mated thermostatic operator which is pushed on in its place. This youtube video ( https://www.youtube.com/watch?v=udg7OkWaLdovle) shows the valve with the gray protective cover removed, then shows installation with the white operator in place of the gray cover and a standard steam valve. These are GREAT vavles! Install carfully with included instructions, or find instructions on the internet at http://na.heating.danfoss.com/PCMPDF/RA%20valve%20-%20type%20RA%202000%201PS%20instructions%20-2011.pdf
Simply use a screw driver and pry off
Q: Hi, I have a radiator that is recessed in the wall and I have about 3" clearance from the end of the radiator to the edge of the wall. Can I get this valve to work by turning the Valve 90 deg. from the radiator? Is there a part made specifically for such an application? I would also need a remote sensor since I will be installing a radiator cover. (It is a 1-pipe system) Any help would be appreciated.
Asked by DTheo 13 years ago
Add your answer
Look up danfoss data sheets using the following: Danfoss radiator thermostatic vent There is a sheet that has several options Sent by Tom Steiger at CLAAD MECHANICAL LLC from portable communication device.
Danfoss makes a 90 degree elbow for the TRV valve. I had to use it on 3 radiators in my home BUT you need a minimum clearance of 41/2 inches from the end of the radiator to the wall for it to work. You might cobble together something out of steel pipe but understand that the entire TRV valve assembly will then project outward of the radiator. I'll try attaching a picture of the Danfoss assembly to this reply. I'm not certain the "system", (PexSupply) will allow it. ...............
It should work fine. I think my clearance was about 3" Your requirements are as follows: 1. The steam vent must be vertical. 2. You must be able to screw everything in tight enough to prevent leaks of low pressure steam, thus the Teflon tape. 3. You need easy access to the "knob" on the valve to attach the thermostatic controller. 4. The connections need to drain back into the radiator or at least into the pipe coming out of the radiator, i.e. out of the steam vent and out of the valve. Your parts needed are: .. 1/2" Teflon tape. You need a lot of tape because you cannot screw the connections as tight as possible. You have to tape things and start screwing them in so they end up pointing in the required direction in the steps below. They don't have to be that tight because you steam pressure should be below 5 psi, if not a lot lower. .. One (1) 90 degree 1/8" brass "street" elbow. Street elbows have female threads one end and male threads the other so you won't need any couplers. .. One (1) 45 degree 1/8" brass street elbows. If Pex cannot find one, check your local hardware store, Grainger, or Google other supply houses such as Zoro Tools http://www.zorotools.com/g/00056438/k-G1455535?utm_source=google_shopping <http://www.zorotools.com/g/00056438/k-G1455535?utm_source=google_shopping&u tm_medium=cpc&utm_campaign=Google_Shopping_Feed&kw=%7bkeyword%7d&gclid=CMvHt 97O27wCFeYDOgod6TYA0g> &utm_medium=cpc&utm_campaign=Google_Shopping_Feed&kw={keyword}&gclid=CMvHt97 O27wCFeYDOgod6TYA0g .. A vertical air vent. The Hoffman 41 is a good model. (It does not need to be adjustable like the Hoffman 1A because your valve is doing better adjusting.) .. The Danfoss thermostatic controller of your choice for the valve. I recommend sticking with the simplest controller that attaches directly to the valve unless it ends up in a difficult place to access. Because your steam boiler is cycling, a remote temperature sensor is probably not necessary. You want the valve to close a skip a cycle when the room is warm enough. By the time the next cycle starts your air should have mixed enough to get a useful temperature reading near the radiator. The installation is a follows. You can screw together all the above parts first off the radiator to get a feel on how the angles work out and the space that will be required, but because of space limitations you will probably need to install it in the following order. 1. Install with Teflon tape a 90 degree 1/8" brass "street elbow" in the radiator vent hole so that the elbow is tight at 1:30 on the clock 45 degrees past vertical so that female end point towards you (away from the wall) and up at 45 degrees above horizontal (45 degrees past or below vertical). For the next two steps you have some choices. Do what works for you in terms of space and access to the control knob on the valve. (If necessary you could even come out horizontal in step 1 and/or use an extension, but I prefer to minimize the horizontal connections so that all condensation (not much in the valve) drains back into the radiator.) The following worked well for me with the controller accessible and the steam vent back in close the radiator. 2. Again with Teflon tape screw the male thread of the valve into the female threads of the street elbow and tighten it so the pipe for the air vent is pointing up and back towards the wall at 45 degrees above horizontal. 3. The screw in with Teflon tape the 45 degree elbow so the female end points straight up. 4. Screw in the straight air vent and you're done. Hope this works. If not, ask again, and I will measure and send a photo of one of my installations. Best, Ed Resor
I had a similar situation with a radiator that was too close to the wall, and under a radiator cover. I used a street ell (male thread one end, female the other) to mount the valve, and a remote sensor and thermostat dial. Worked fine.
I think the vents need to be vertically oriented (at least the ones i use that have floats). maybe if you can find a female/male 90 degree elbow pipe fitting it could work. let me know if you find a solution.
Q: I have this installed on my radiators and one of them starts banging as the valve heats up. I have a feeling the radiator is angled slightly wrong and the water is not draining back into the radiator. Is there a 45 degree elbow or something that I can install to fix this?
Asked by Ken 13 years ago
Add your answer
not sure -- but you could try to shim the raditor so it is pitched towards the incoming steam pipe and will drain properly...
Did you put a vent on the power head?
in single pipe system radiator might need to be jacked a little so air vent end is a little higher than shut off valve end it worked for me. good luck.
Could also be a bad bleeder valve. I had the same problem and thought the radiator was not angled right, but it was. As soon as I replaced the bleeder valve with a new one, the banging stopped. I am assuming that the valve was clogged and not allowing air in so the water could drain back down to the boiler. Sent from my iPhone
Where do you want to install a 45 degree angle? What do you think a 45 degree angle will accomplish? You write that you think the water might not be draining from the radiator....have you checked the level of the radiator and does it pitch towards the steam supply pipe allowing condensate to drain properly? Is the supply valve fully open? If the supply valve on the steam supply pipe is not fully open the radiator will not work correctly. Read about one-pipe steam systems at <HeatingHelp.com>.
Q: Can i use any air vent on this Danfoss valve. I have Varivalve Straight 925006-00 Radiator Air Vents and like them because they make very little noise. Thanks
Asked by mike87 14 years ago
Add your answer
I don't see why not. This valve's operation is pretty simple - it is either open to the vent or closed, at which point it acts like a check valve allowing air into the radiator but not out of it. When it's open, it just relies on the air vent to function by letting air but not steam to vent. Any valve should work with it as long as it is the correct orientation.
yeah! these are great -- allow me to adjust temp around the house much better than just with air vents. it can take any (1/4"??) straight air valve -- whatever the normal size is.... i had all 90 degree ones on before so i had to get straight valves. maybe i should try some varivalve on my one noisy radiator...
A vent is a vent. Some make more noise than others.
Should be able to- I used a Dole 1-A (variable) on mine
Q: I wish the product descriptions were more informative and less cryptic. It would be extremely helpful if the product listing gave that numbers of the other parts that are needed for specific applications (e.g. 1 pipe steam). You might consider bundling the three parts that one needs for a thermostatic assembly together under one product number. My understanding is that the gray control pictured is a manual control, and to implement a thermostatic valve function for 1 pipe steam, one also needs the Danfoss Direct Mount Operator (013GB8250) and a vertical air valve (e.g. Danfoss 013L8011). I imagine that one takes off the gray manual control knob and replaces it with the white thermostatic operator, and one removes the brass plug on top and inserts the air valve. Is this correct? It seems that all of the thermostatic steam air valve controls have these three parts. Are there any alternatives available that combine the operator and steam valve? Thanks for your help, much appreciated.
Asked by SteamPunk 15 years ago
Add your answer
Verified Reply- PexSupply StaffYou are correct with regards to the three Danfoss parts that are necessary. Honeywell part V2043HSL10 combines the valve and the air vent.
These comments refer to the one pipe steam configuration of DanFoss, which is what I have installed. Steve, you got it right with one clarification. The "gray control" on the valve is a cover for a little pin which when pushed in closes the valve. The direct mount operator is a required piece (the valve is always closed without it), and it does snap in place where the gray cover had been. And as you say, you need all three pieces (about$124 total) for the system to work. Installation is 15 minutes: screw in the valve in place of your present steam release valve, snap on the Direct Mount Operator after removing gray cover, and put the vertical air valve on top of the valve. The direct mount operator has a dial knob to choose the temperature at which the valve closes stopping any further heating. Good luck!!! . . . I love this product so far (1 month of heating season).
Q: Is there a rebuild kit for this valve?
Asked by Timbo 16 years ago
Add your answer
Verified Reply- PexSupply StaffYes, it is part number 013G0290.
Q: does this unit come with an actuator or is that sold separately too?
Asked by steamguy321 16 years ago
Add your answer
Verified Reply- PexSupply StaffThe actuator must be purchased separately.
Q: I do not see air vent listed. do you carry it or is there another air vent that is compatible?
Asked by 16 years ago
Add your answer
Verified Reply- PexSupply StaffThis unit does not come with the air vent. The specific vent you are asking for can be found on our site here: http://www.pexsupply.com/Danfoss-013L8011-1-Pipe-Steam-Air-Vent
Q: does this valve include an air vent; Danfoss air vent #013L8011. If not, please provide a price or a substitute.
Asked by 16 years ago
Add your answer
Verified Reply- PexSupply StaffThis unit does not come with the air vent. For the specific air vent you are asking for, please see SKU: 013L8011