


'/%3E%3C/svg%3E)
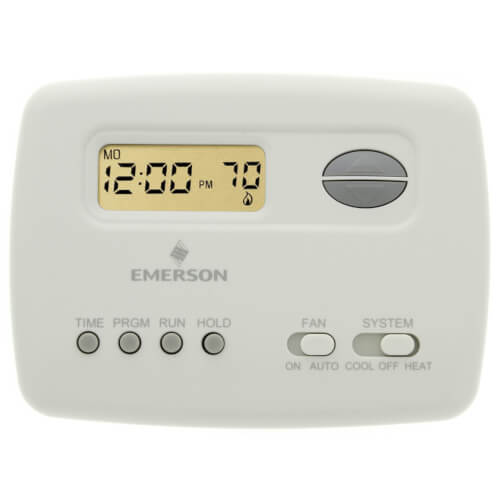
70 Series Programmable, 1H/1C, Digital Thermostat
MANUALS (3)
Product Highlights
Description
1F78-151
5+2 Day Programmable Thermostat, 24 Volt or Millivolt system, Horizontal
FEATURES
- Battery powered for maximum compatibility.
- Fossil fuel or electric heat compatible.
- Large LCD with backlight.
- Selectable Celsius or Fahrenheit temperature display.
- Includes O and B terminals.
- Classic White color.
Specs
| Amperage: | 1.5 |
|---|---|
| Application: | Single-Stage (Heat/Cool) |
| Stages: | 1 Heat/1 Cool |
| Programmability: | 5-2 Day Programmable |
| User Interface: | Push Button |
| Mount: | Horizontal |
| Options: | Fan Control |
| Power Method: | Battery |
| Changeover: | Manual |
| Temperature Range (F): | 45°F - 90°F |
| Voltage: | Low voltage 24V |
| Wattage: | 1.5 to 45 |
| Wiring: | O W G B Rh Y Rc |
| Color: | White |
| Height: | 3-3/4" |
| Width: | 5-1/8" |
| Depth (Inches): | 1-1/8" |
Contact

Happy Independence Day!
Compare Similar Products

Programmable
You May Also Need
Product Reviews
Most Liked Positive Review
White Rogers thermostat 1f78-151 no backlight.
Most Liked Negative Review
Worst thermostat for wiring space
Worst thermostat for wiring space
I use these at all my rentals and my own home.
Replaced with exact same
User Friendly
Very Satisfied
Used in the basement and garage.
Exactly what was needed
feels cheap -- no back light
Perfect part
Great buy and service
Product Q&A
42 QuestionsQ: My display shoes Lo on it what does this mean?
Asked by Lisa the new girl 12 years ago
Add your answer
This indicates that the batteries are low and should be replaced. For best results, replace batteries once a year with 2 “AAA” alkaline batteries. Install the batteries along the top of the base. The batteries must be installed with the positive(+) ends to the right.
Q: What does the "hold" button mean?
Asked by Powell 12 years ago
Add your answer
"Hold" maintains the current temperature settings then in effect.
Q: what does the programmed temperature mean? Does it show the target temperature or the start temperature? For instance, if I set the thermostat program as "HEAT" and "6:00 70F", what will it do exactly?
Asked by jilwang 13 years ago
Add your answer
The programmed temperature is the target temperature. 6:00 is the start time of that heating period, and 70F is the target temperature. Please refer to the user guide found here on our site : http://s3.pexsupply.com/product_files/White%20Rodgers%20-%201F78-151%20-%20Install%20Instructions.pdf
Q: how do you start it to have the heat on,
Asked by russy d 14 years ago
Add your answer
The system button should have a cool, off and heat position. Switch the system button to heat and adjust the thermostat to your desired temperature.
Q: I lost the operating manual and I need to set my thermostat can someone help?
Asked by Dee 14 years ago
Add your answer
Please see the following: http://s3.pexsupply.com/manuals/1249544570102/White_Rodgers_1F78-151_Instructions.pdf
Please see the following: http://s3.pexsupply.com/manuals/1249544570102/White_Rodgers_1F78-151_Instructions.pdf
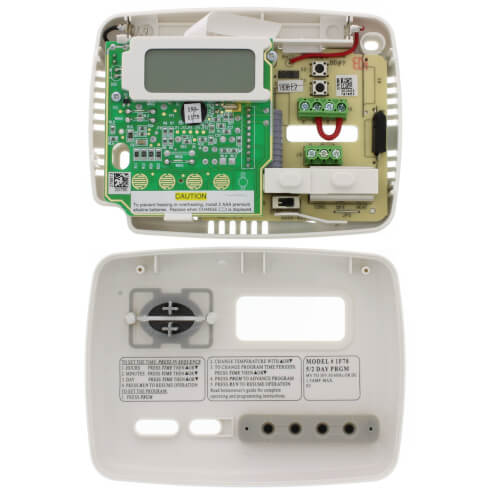
Q: how do i get the cover off to change the battery?
Asked by kathy 14 years ago
Add your answer
You must pull the cover from the base. Do it gently without forcing or prying to avoid damaging the unit.
Q: What does STG1 mean?
Asked by Lene 14 years ago
Add your answer
STG1 means stage 1 - or - single stage.
Q: I have set the time and day of the week and want to put on the air conditioning...my next step would be to switch the system to cool and then what?? This is my first time using the thermostat.
Asked by CR 14 years ago
Add your answer
The following directions are from the Installation Instructions: 1) Move System Switch to COOL 2) Press PRGM once. “A” (indicating weekday program) will appear in the display. Also displayed are the currently programmed start time for the 1st cooling period and the currently programmed temperature (flashing). 3. Press the up or down buttons to change the displayed temperature to your selected temperature for the 1st cooling program period. 4. Press TIME once (the programmed time will flash). Press the up or down buttons until your selected time appears. The time will change in 15 minute increments. When your selected time is displayed, press TIME again to return to the change temperature mode. 5. Press PRGM once. The currently programmed start time and setpoint temperature for the 2nd cooling program period will appear. 6. Repeat steps 4 and 5 to select the start time and cooling temperature for the 2nd cooling program period. 7. Repeat steps 4 through 6 for the 3rd and 4th cooling program periods. Weekday cooling programs are now complete. 8. Press PRGM once. “SA SU” (indicating weekend program) will appear in the display, along with the start time for the 1st cooling period and the currently programmed temperature. 9. Repeat steps 4 through 8 to complete weekend cooling programming. 10. When you have completed entering your cooling program, press RUN.
Q: My thermostat is stuck; It will not let me change the temperature. I have changed the batteries twice. Any suggestions on what this can be?
Asked by ML 14 years ago
Add your answer
Try resetting the thermostat. If a voltage spike or static discharge blanks out the display or causes erratic thermostat operation or the keypad to not respond, you can reset the thermostat by pressing the up and down and TIME buttons at the same time. Keep in mind that this also resets the factory defaults.
Q: is there a way to reset my thermostat, cause it is not working right
Asked by superman 14 years ago
Add your answer
You can reset the thermostat by pressing the up and down buttons and the TIME button all at the same time. This will also reset the factory defaults.